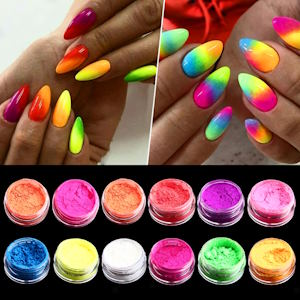
Welcome to the electrifying world of neon nail art, where colors come to life in bold and captivating designs. Neon nails have taken the beauty industry by storm, offering a burst of vibrancy and an instant mood lift to anyone who dares to flaunt them. From sizzling hot pinks to eye-popping greens and blazing oranges, neon hues command attention and bring a whole new level of excitement to your fingertips.
Basic Neon Nail Art Techniques
Neon nails have become the ultimate fashion statement, and mastering the basics of neon nail art is the first step to achieving that eye-catching and vibrant look you desire. Let’s explore some of the fundamental techniques that will help you create stunning neon nail designs:
Solid Neon Nails
When you want to keep things simple yet striking, solid neon nails are the way to go. Follow this step-by-step guide to applying solid neon polish for a flawless finish. Start with clean and well-prepped nails, then apply a base coat to protect your nails and create a smooth canvas. Next, carefully apply two coats of your chosen neon nail polish, allowing each coat to dry before applying the next. Finish off with a high-quality top coat to seal in the color and enhance its longevity. Solid neon nails are perfect for any occasion, whether it’s a casual day out or a night on the town.

Neon French Tips
Put a modern twist on the classic French tips by embracing the neon trend. To achieve this playful and edgy look, you’ll need a steady hand and some nail striping tape. Start by applying a base coat and let it dry completely. Then, use the striping tape to create a straight line at the tip of your nails. Apply the neon polish of your choice over the tip, and carefully remove the tape while the polish is still wet. Once the tips are dry, seal in the design with a glossy top coat. Neon French tips are a fun way to add a pop of color to your nails without going over the top.
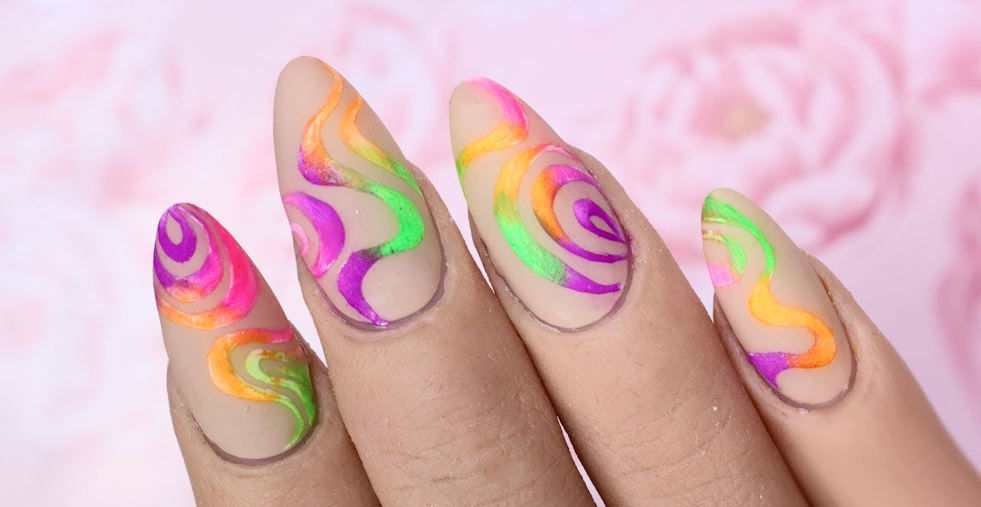
Gradient Neon Nails
For a mesmerizing and seamless transition of colors, gradient neon nails are the go-to technique. Choose two or more complementary neon shades and a makeup sponge. Begin by applying a base coat and letting it dry. Then, apply the neon colors onto the sponge in overlapping lines. Dab the sponge onto your nails in a gentle patting motion, gradually building up the colors to achieve a smooth gradient effect. Once dry, apply a top coat to blend the colors further and seal the design. Gradient neon nails will showcase your artistic prowess and make your nails stand out in any crowd.
Neon Accent Nails
If you’re hesitant to go full neon but still want that wow factor, neon accent nails are the ideal compromise. Pick one nail, usually the ring finger, and use it as your canvas for creativity. It could be a simple neon heart, a geometric pattern, or even a neon nail sticker. This technique allows you to experiment with neon without overwhelming your entire manicure. Accent nails add a touch of flair and individuality, making your neon nail art truly unforgettable.
Tips for Maintaining Neon Nails
Neon nails are a fantastic way to add a burst of color and personality to your overall look. To keep those vivid hues looking fresh and fabulous, proper maintenance is essential. Here are some valuable tips to help you maintain the vibrancy of your neon nails and ensure they stay flawless for as long as possible.
Prolonging the Vibrancy of Neon Colors
 Use a Quality Base Coat: Before applying neon polish, always start with a high-quality base coat. This not only helps to protect your natural nails but also creates a smooth surface for the neon color to adhere to, preventing any staining.
- Avoid Direct Sunlight: Neon colors are more prone to fading when exposed to direct sunlight for prolonged periods. To maintain their brilliance, try to limit your sun exposure or use sunscreen on your hands when you’re out in the sun.
- Reapply Top Coat Regularly: Over time, the top coat on your neon nails may wear off, leading to a decrease in shine and vibrancy. Reapply a fresh top coat every few days to keep the neon colors looking fresh and glossy.
Protecting Your Neon Nail Art
- Wear Gloves for Household Chores: Harsh cleaning agents and household chores can be damaging to your neon nails. To protect them, always wear gloves when doing household tasks to shield your manicure from chemicals and abrasions.
- Avoid Picking or Biting: As tempting as it may be to pick at chipped nail polish, refrain from doing so. Picking or biting your neon nails can lead to peeling and damage, potentially ruining your beautiful manicure.
Safely Removing Neon Nail Polish
- Use Acetone-Free Nail Polish Remover: Acetone-based nail polish removers can strip away the neon color and leave your nails looking dull. Opt for acetone-free nail polish removers, which are gentler and less likely to cause fading.
- Wrap Method for Removal: When removing neon nail polish, use the wrap method. Soak cotton balls or pads in nail polish remover, place them on your nails, and wrap each fingertip with aluminum foil. This method allows the remover to sit directly on the nail, making the removal process more effective and efficient.